: : : : Stimpak Counter New Vegas : : : :
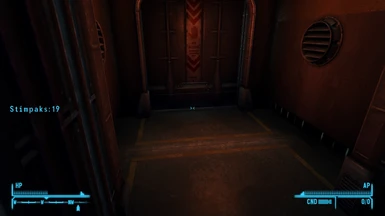
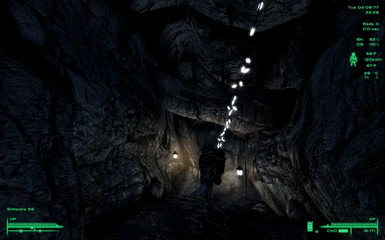
This is a simple port of Antistar's Fallout 3 Stimpak Counter for Fallout New Vegas. It adds a movable Stimpak counter to your HUD.
- Unified HUD Project has added support! Many thanks to Gopher and Gribbleshnibit8.
- Super Stimpak and Auto-Inject Stimpak (requires Lonesome Road) versions added.
- FOMOD uploaded. Easily switch between versions.
- To move the HUD, hold Right-Shift + Up, Down, Left, Right arrow keys
- The mod adjusts to the fonts you have installed, so if you have DarnUI (recommended), the HUD font will be much smaller (see screenshot)
: Installation :
(modified from original readme)
Requires NVSE
It is highly recommended you use Unified HUD Project!
1) Install using a mod manager or extract the contents of the archive file to your Fallout New Vegas\Data\ directory. If asked if you want to overwrite files and folders, click 'Yes to all' (or equivalent in whatever OS version you have).
2a) If you have Unified HUD Project installed, make sure you have updated to the latest version with Stimpak Counter NV support, then deactive/reactivate the mod and make sure Stimpak Counter NV is checked. Skip to Step 4.
2b) If you do not have Unified HUD Project installed, navigate to your Fallout New Vegas\Data\menus\main\ directory, and check to see if hud_main_menu.xml is there.
3a) If it is not, or if that folder does not exist, move the \main folder located in data\menus\prefabs\SC into the data\menus folder and skip to Step 4.
3b) If the file is there, open it up using a text editor. Scroll to the bottom, and just above the last line, add:
<include src="SC\SC_HUD.xml" />
The last two lines will then look like:
<include src="SC\SC_HUD.xml" />
</menu>
4) Enable the Stimpak Counter.esp in your load order manager and you're done. Position in your load order is unimportant.
Once installed, check to make sure any further mods you install do not overwrite hud_main_menu.xml. If they do, repeat Step 3b once the file has been overwritten. If you're not sure, check (it should be pretty apparent, the hud counters will disappear the next time you play the game).
: Using the Mod :
If installed correctly, the counter will appear on your HUD when you next load up the game. To adjust its position on your screen, hold down RIGHT-SHIFT and use the arrow/cursor keys on your keyboard to shift it right, left, up or down.
Note that the counter will turn red if you have less than seven Stimpaks left, and will begin flashing if you have less than four left.*
*I have uploaded an alternate file that doesn't turn red until you have two or fewer Stimpaks and doesn't flash until you have zero. I found this particularly helpful early in the game when Stimpaks are at a premium and you don't want the flashing HUD as a constant distraction. You can switch to the higher count version later.
Super Stimpak and Auto-Inject Stimpak (requires Lonesome Road) versions also available. You can currently only use one version at a time.
: Additional Information :
This is compatible with DarnUI and every other UI and HUD mod. Just follow the installation instructions.
Activating or de-activating this mod should not have any negative effects on your existing save game(s) - but as always, it is good practice to keep backups.
This mod uses RIGHT-SHIFT plus the arrow/cursor keys (in combination) as hotkeys, and so may have compatibility issues with other mods that use the same keys. Obviously it could also be an issue if your custom key-binds for the game happen to result in you needing to press RIGHT-SHIFT and the arrow keys at the same time as part of normal gameplay.
This mod was built using Imp of the Perverse's HUD Counter Template
By downloading and using this modification, you agree that the author of the modification cannot be held responsible for any damage to software or hardware directly or indirectly caused by the aforementioned modification. Use at your own risk, basically.


